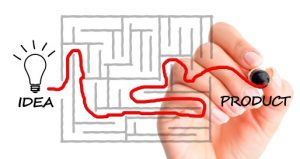


Moving a complex hardware product into production requires more than completing the design and handing it to manufacturing. The product, documentation, sourcing, test strategy, and production approach mature at different points, and each transition introduces a different set of questions.
A structured new product introduction process helps engineering, manufacturing, sourcing, quality, and program teams understand what has been proven, what still needs work, and what must be controlled before the product advances. For complex machinery and electromechanical systems, the process typically moves from product definition through prototyping, pilot builds, production release, and early production.
The value of a hardware NPI process is not simply dividing a program into stages. It is making sure each phase resolves the right uncertainties before greater cost, material, and production commitments are made.
What Is New Product Introduction?
New product introduction, or NPI, is the process of moving a new or substantially changed product from development into controlled production. The exact NPI lifecycle depends on product complexity, technical maturity, regulatory requirements, production volume, and how much of the product and manufacturing approach has already been proven.
For complex hardware, a practical NPI process flow looks like:
Product definition → Prototype → Pilot → Production release → Early production
These NPI phases are useful milestones, but hardware development is rarely linear. Prototype results may require a design change, while a pilot build may expose a sourcing, assembly, or test issue.
Iteration is expected. What matters is carrying what the team learns into the next decision rather than allowing unresolved issues to move forward in the NPI workflow.
The 5 NPI Phases for Complex Hardware
1. Establish the Product Definition
The first phase of the new product introduction process is about creating enough technical definition to move from an early concept into meaningful engineering development.
Start by defining the product’s intended function, critical performance requirements, major interfaces, operating conditions, physical constraints, and applicable technical or regulatory requirements that could shape the design. The team should also identify important assumptions and risks that still need to be resolved.
From there, the concept begins to take technical form. Depending on the product, this may involve system architecture, preliminary component selection, feasibility analysis, mechanical layouts, electrical or controls concepts, and early decisions about how major subsystems will interact.
That work should be captured in enough engineering documentation to support prototyping. Depending on the product, that may include preliminary CAD models, drawings, schematics, interface definitions, an early BOM or critical-component list, and initial test criteria. These records do not need to be production-ready, but they should give the team a shared technical definition of what is being developed.
Once that initial technical definition is in place, teams can align the people, resources, infrastructure, and supplier support needed to move forward. Cross-functional coordination early in the NPI process can help surface sourcing, manufacturing, quality, and program considerations before they create problems late Product development planning covers those broader program needs in more detail.
By the end of this phase, the product should be defined well enough to enter purposeful prototyping.
2. Use Prototypes to Resolve Technical Uncertainty
Once the product is defined well enough to build representative hardware, prototyping turns engineering assumptions into physical evidence.
A prototype should address the uncertainty the team is trying to reduce. It may focus on motion, fit, load handling, thermal performance, controls behavior, a critical interface, or another specific risk. Depending on the product, it might represent one mechanism, a subsystem, an electrical assembly, or a more complete machine. Our guide to getting a product prototype made goes deeper into turning that technical definition into representative hardware.
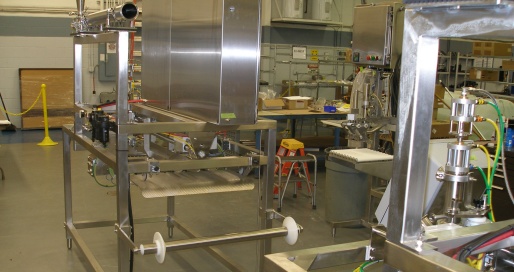
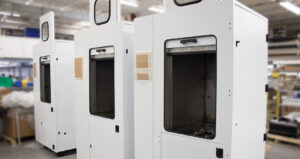
Prototype for fluid handling application.
At this stage, the prototype does not necessarily need to reflect the final manufacturing process. Materials, components, tooling, and assembly methods may still change. It only needs to be representative enough to provide useful evidence about the design.
Physical hardware can expose issues that are difficult to see in CAD or analysis alone, including assembly access, tolerance interactions, component behavior, interfaces, thermal conditions, and functional performance.
Those findings should feed back into the product definition. CAD models, drawings, BOMs, schematics, requirements, and other technical records should be updated as design decisions are confirmed or changed. Our blog on hardware product development explains that process in greater depth.
Prototyping is often iterative. One build may answer several questions while exposing new ones, leading to design changes and another prototype cycle. Prototype testing should therefore be tied to defined requirements and engineering objectives rather than a general conclusion that the hardware “works.”
By the end of this NPI phase, the major technical questions should be resolved well enough to move into pilot production.
3. Use Pilot Builds to Prove the Manufacturing Approach
Pilot production marks a key transition in the NPI lifecycle, shifting the focus from proving the design to proving how that design will be built.
Pilot units should increasingly reflect the intended production configuration and manufacturing approach. Materials, suppliers, drawings, BOMs, tooling, assembly methods, inspection requirements, and test procedures should be close to what the team expects to use after release.
This is where manufacturing issues may become more visible. Tight tolerances may be difficult to hold consistently, assembly access may slow production, a component may create sourcing risk, or inspection and test requirements may require different tooling or sequencing. Applying design for manufacturing principles before release gives the team time to address those issues deliberately.
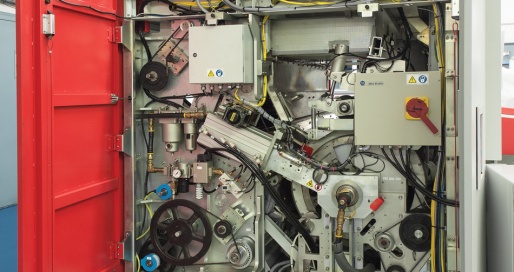
Pilot builds also show whether lessons from prototyping have been carried into the current product and manufacturing information. Temporary substitutions, undocumented fixes, and informal assembly decisions should be resolved before they become part of the production baseline.
At this point in the NPI process, documentation, sourcing, quality controls, tooling, test methods, and assembly processes must mature together. Our blog on NPI manufacturing covers that work in more detail.
By the end of the pilot phase, the team should have evidence that the product definition and manufacturing approach can support controlled production.
4. Establish a Controlled Production Baseline
Once pilot builds show that the product and manufacturing approach can work together, the new product introduction process moves toward production release and a controlled manufacturing baseline.
Manufacturing needs a controlled definition of what to build, which documents apply, and how the finished product will be inspected and tested.
For complex hardware, that baseline may include:
- approved drawings and BOMs
- current specifications and revisions
- manufacturing instructions
- inspection requirements
- functional test criteria
- tooling or process requirements
- configuration and change controls
Production release does not mean the product can never change again. It means future changes should follow a defined review and approval process, so engineering, sourcing, manufacturing, and quality remain aligned.
That control becomes more important once recurring purchasing and production begin. A change to one component, drawing, test requirement, or assembly method can affect suppliers, work instructions, inspections, and other parts of the product.
Requirements may also vary by industry. In regulated medical-device programs, for example, applicable design and development controls influence how design outputs, changes, and manufacturing information are managed.
By the end of this phase in the NPI lifecycle, production should have an approved definition of what to build, how to build it, and how to verify it.
5. Stabilize Early Production & Transition Out of NPI
Production release does not mean the program immediately reaches steady-state manufacturing.
Early recurring builds show how the released product and process perform across multiple units. Issues that seemed isolated during development may become patterns once the same suppliers, assembly methods, inspections, and tests are repeated.
Teams may see recurring issues involving:
- assembly
- supplier or material variability
- inspection results
- test failures
- rework
- first-pass yield
- repeated engineering questions
The goal is to determine whether those patterns point to a product, process, supplier, documentation, or quality-control problem that needs attention.
When changes are needed, they should follow the controls established during production release rather than becoming informal workarounds.
As the product and process stabilize, the program reaches the end of the NPI process flow and transitions into ongoing production management. If the next challenge is increasing recurring output, scaling hardware production becomes a separate concern involving capacity, material flow, staffing, test resources, and production rate.
By the end of this phase, the product should be operating under a stable, controlled production process, with responsibility shifting from NPI execution to ongoing manufacturing.
Use the NPI Process to Understand What the Product Needs Next
A well-structured new product introduction process helps teams judge product maturity, understand what has been proven, and determine what needs to happen next.
At each point in the NPI lifecycle, the question changes:
- Is the product defined well enough to move into purposeful prototyping?
- Has prototype hardware resolved the major technical questions well enough to move toward pilot production?
- Have pilot builds shown that the product and intended manufacturing approach can work together under production-representative conditions?
- Is there an approved, controlled product and process baseline that production can execute?
- Has early recurring production stabilized enough for the program to transition out of NPI?
That progression is the practical value of the NPI stages. Each phase establishes a different kind of evidence as the product moves from definition toward controlled, repeatable production.
 PEKO supports complex mechanical, electrical, and electromechanical systems through New Product Introduction services, from engineering and prototype support through pilot builds and production launch.
If you are trying to determine where your program currently sits in the NPI lifecycle, our NPI Self-Assessment Checklist can help identify areas that may need attention before the next phase.