

A reverse engineering project is only useful if it produces documentation that engineering, sourcing, manufacturing, inspection, assembly, and test teams can actually use. For OEM machinery, parts, assemblies, and electromechanical systems, that means the process must capture more than dimensions. It must also account for function, configuration, purchased components, interfaces, tolerances, and build requirements.
This article explains the reverse engineering process from initial scope definition through documentation development. It focuses on the practical steps involved in recreating CAD models, drawings, bills of materials, schematics, cable drawings, and other technical information for customer-owned products.
What Is Reverse Engineering?
Reverse engineering is the process of analyzing an existing product to recreate or improve the technical information needed to understand, manufacture, maintain, or modify it. In mechanical and electromechanical manufacturing, this may include disassembly, measurement, inspection, CAD modeling, documentation development, component identification, and functional review.
The goal is not always to reproduce the product exactly as it exists. In many cases, the goal is to create a reliable documentation baseline that reflects the product’s required function and can support future decisions. That may include replacing an obsolete part, transferring production to a new supplier, preparing for a prototype or pilot build, updating a design, or creating production-ready documentation.
Reverse engineering should be performed only on products the customer owns or has the right to document and reproduce.
When Is Reverse Engineering Used?
OEMs may use reverse engineering when a physical product exists, but the technical documentation is missing, incomplete, outdated, or difficult to use.
Common situations include:
- A legacy machine has no current CAD models or drawings.
- A supplier can no longer provide a part, assembly, or documentation package.
- An acquired product line needs organized engineering records.
- A production transfer requires better drawings, BOMs, or build instructions.
- A mechanical part needs to be recreated from an existing sample.
- An electromechanical assembly needs updated wiring, controls, or cable documentation.
- A mature product needs CAD cleanup before an engineering change.
- A prototype or test system needs to be documented for future builds.
In these situations, the reverse engineering process helps recover information that may otherwise remain trapped in the physical product.
Reverse Engineering Process Steps
The exact reverse engineering steps depend on the product, documentation available, and end goal. A simple mechanical part may require inspection, measurement, CAD modeling, and a drawing. A complex machine or electromechanical system may require disassembly, BOM development, controls documentation, cable drawings, tolerance analysis, and assembly drawings.
A typical reverse engineering process may include the following steps:
Step 1: Define The Scope & Ownership
Before disassembly or measurement begins, the team should confirm the project scope and product ownership. This includes defining what needs to be recreated, what documentation already exists, what the customer owns, and what the final deliverables should include.
Key questions include:
- Is the goal CAD reconstruction, manufacturing documentation, production transfer, replacement part support, or design improvement?
- Is the product mechanical, electrical, controls-based, or electromechanical?
- Are any drawings, BOMs, schematics, manuals, or supplier files available?
- Which features, interfaces, or performance requirements are critical?
- What file formats or documentation standards are required?
A clear scope helps prevent the project from becoming a broad teardown without a defined engineering output.
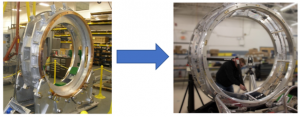
Step 2: Document The Fully Assembled Product
Before a product is disassembled, the team should document its current condition. Photographs, notes, labels, and configuration records help preserve how the product is assembled and how components relate to each other.
For machinery and assemblies, this step may include documenting:
- Overall machine layout
- Sub-assembly locations
- Cable routing
- Controls hardware
- Mechanical interfaces
- Fastener locations
- Nameplates and component markings
- Adjustment points
- Safety covers or guards
- Purchased parts and supplier identifiers
This reference information becomes important later when the team creates assembly models, drawings, schematics, and build documentation.
Step 3: Create Or Update the Bill of Materials
A bill of materials, or BOM, identifies the parts, components, hardware, purchased items, and sub-assemblies that make up the product. During reverse engineering, the BOM may need to be created from scratch or updated from an incomplete customer record.
For complex equipment, BOM development may include:
- Mechanical components
- Weldments and fabricated parts
- Purchased hardware
- Motors, sensors, actuators, valves, and pneumatic components
- Controls hardware
- Electrical components
- Cable and wire assemblies
- Fasteners and mounting hardware
The BOM should also account for part numbering, configuration control, revision status, and customer-specific naming conventions where applicable.
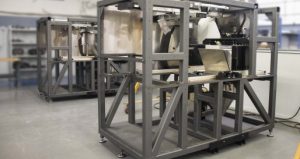
Step 4: Disassemble & Inspect Components
Disassembly should be controlled and documented. The team should record how the product comes apart, how components are oriented, and where critical interfaces exist.
After disassembly, individual components can be inspected and measured. This may include dimensional measurement, visual inspection, feature identification, interface review, and evaluation of wear or damage that may affect the reverse engineering result.
For mechanical reverse engineering, this step is critical because the physical part may not perfectly represent the original design intent. The team may need to distinguish between intentional features, wear, distortion, manufacturing variation, and damage.
Step 5: Identify Purchased Components
Purchased components should be identified and verified where possible. This may include manufacturer, part number, specification, function, availability, and potential replacement options.
In machinery and electromechanical systems, purchased component identification may include motors, drives, PLCs, sensors, switches, valves, actuators, power supplies, connectors, fittings, and controls hardware.
This step is important because not every item should be recreated as a custom part. In many cases, the correct engineering decision is to identify, document, source, or update the purchased component.
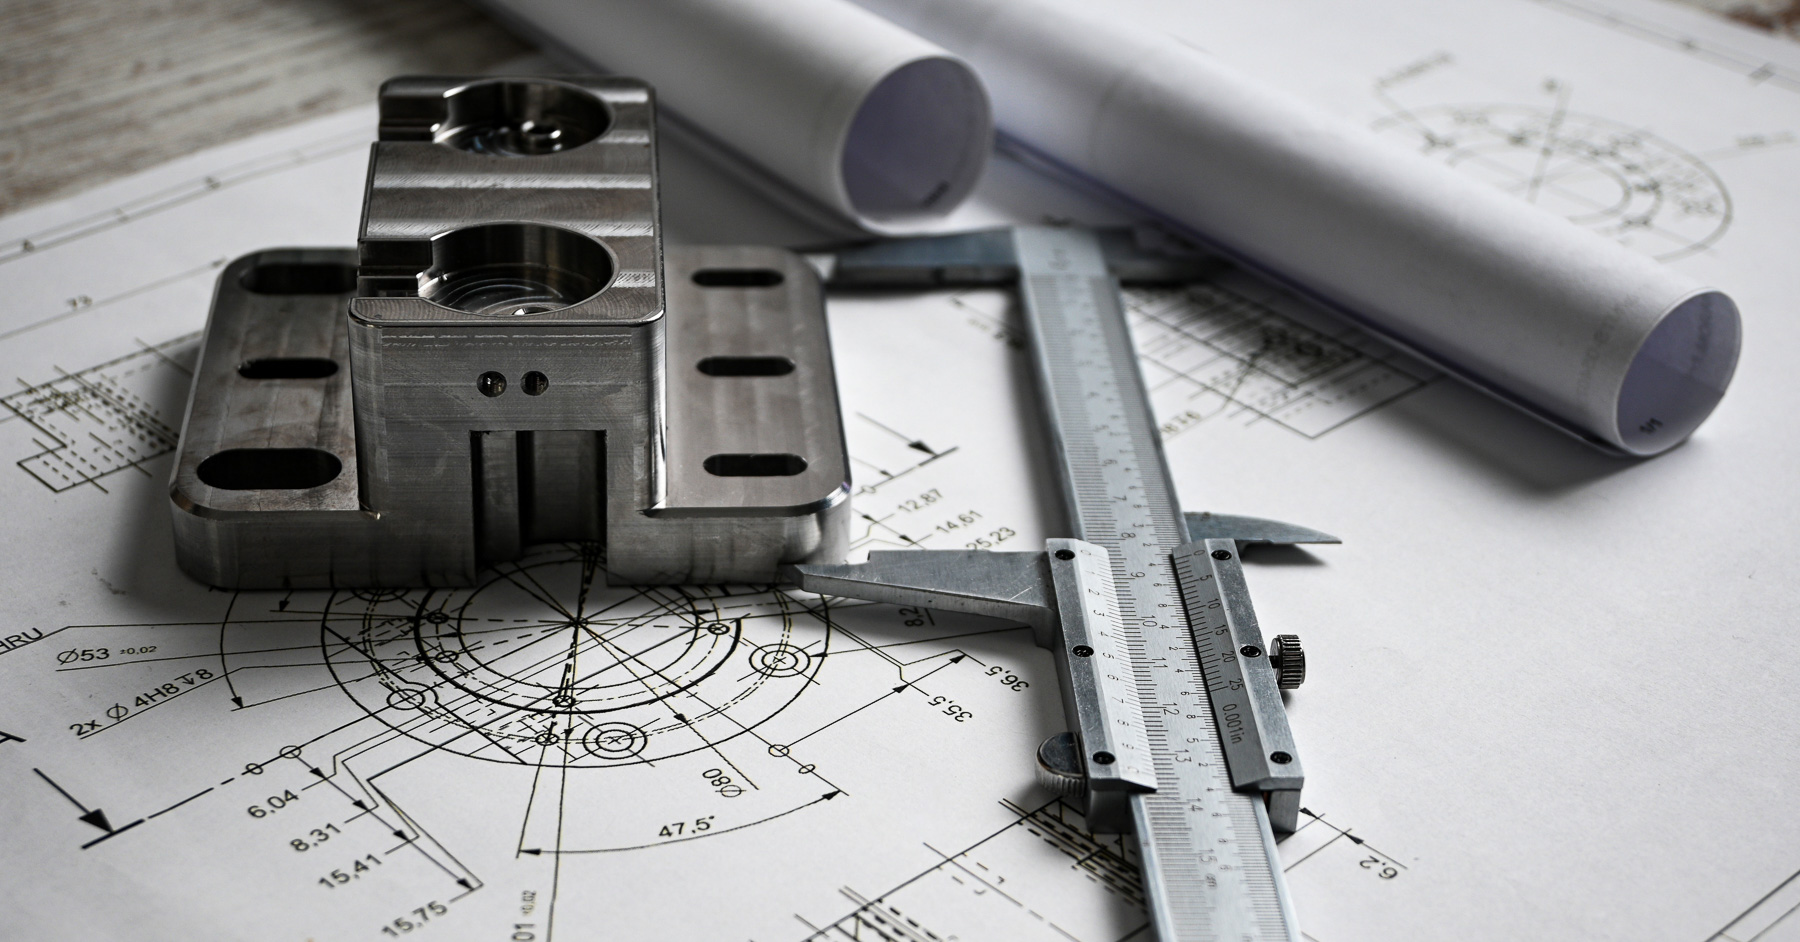
Step 6: Create CAD Models
CAD reverse engineering turns physical geometry into digital engineering data. Depending on the project, this may involve manual measurement, inspection equipment, 3D scanning, or a combination of methods.
The output may include:
- 3D CAD models for individual components
- Weldment models
- Sub-assembly models
- Full assembly models
- Configurations and constraints
- Critical interface geometry
- Reference geometry for future design updates
For assemblies, CAD models should reflect how parts fit and function together. This may require tolerance review, constraint development, and confirmation of functional relationships between components.
Step 7: Develop Drawings & Technical Documentation
After the CAD model is created, the team can develop drawings and supporting documentation. This may include detailed component drawings, assembly drawings, parts lists, annotations, notes, dimensional requirements, and geometric dimensioning and tolerancing, or GD&T, where required.
For electromechanical systems, documentation may also include electrical schematics, controls layout drawings, pneumatic diagrams, and cable or wire assembly drawings.
This step turns the reverse engineered information into a format that can be reviewed, manufactured, inspected, assembled, and maintained.
Step 8: Validate Critical Features & Functional Requirements
Reverse engineering should include review of the features that affect function. This may include tolerance stack-ups, interface dimensions, mounting points, alignment features, motion paths, load-bearing features, sealing surfaces, sensor locations, or control-related interfaces.
Customer input is important during this stage. The customer may know operating conditions, performance requirements, common failure points, adjustment needs, or critical parameters that are not obvious from the physical product alone.
Validation helps ensure the final documentation supports the product’s required function, not just its visible geometry.
Step 9: Organize The Final Engineering Package
The final reverse engineering package should be organized so it can be used by engineering, sourcing, manufacturing, inspection, assembly, test, and program teams.
A complete package may include:
- CAD files
- Component drawings
- Assembly drawings
- BOMs
- Schematics
- Cable drawings
- Part numbering structure
- Configuration information
- Inspection notes
- Tolerance requirements
- Manufacturing documentation
The specific deliverables depend on the project goals. A replacement component may require only a CAD model and drawing. A production transfer may require a much broader documentation package.
What Makes Reverse Engineering More Difficult?
Reverse engineering becomes more complex when the product has limited documentation, undocumented design changes, obsolete parts, custom controls, worn components, unknown materials, unclear performance criteria, or missing supplier information.
It is also more difficult when the product is a full machine or electromechanical system rather than a single mechanical part. In those cases, the engineering team must understand not only the geometry, but also assembly sequence, wiring, controls, purchased components, test requirements, and functional performance.
How Reverse Engineering Supports Manufacturing
The reverse engineering process creates a technical baseline for future work. Once the product is documented, OEMs can use that information to support sourcing, prototyping, NPI, production transfer, replacement parts, engineering changes, or long-term manufacturing support.
For contract manufacturing programs, reverse engineering can help clarify what needs to be built, how it should be documented, what components are required, and which features need to be controlled during production.
Need Reverse Engineering Services for An OEM Product?
PEKO provides reverse engineering services for customer-owned machinery, equipment, mechanical parts, assemblies, and electromechanical systems. Our team can help recreate CAD models, drawings, BOMs, schematics, cable drawings, controls documentation, and manufacturing documentation for complex OEM programs.
If your product needs documentation for production transfer, prototyping, NPI, sourcing, replacement parts, or ongoing manufacturing support, PEKO can help evaluate the reverse engineering scope and required deliverables.