

A useful product prototype turns a developing design into physical hardware that engineering teams can build, inspect, test, and learn from before the product moves further toward production.
For complex machinery, equipment, and electromechanical products, getting a prototype made usually involves more than ordering a few custom parts. The team has to decide what the build needs to prove, determine whether the design is ready for hardware, choose the right manufacturing approach, source and manufacture components, assemble the system, and evaluate the results.
The prototype does not always need to look or function exactly like the final production version. Its level of fidelity should match the purpose of the build and the engineering questions the team needs to answer.
How to Make a Prototype: The Prototype Development Process
A well-planned prototype development process starts by answering two questions: What is already defined, and what does the next build need to prove? From there, the process typically moves through several connected activities.
1. Define What the Prototype Needs to Prove
Before deciding how to build a prototype, define the questions the hardware is expected to answer.
The team may need to evaluate:
- functional performance and critical product requirements
- a mechanism or motion concept
- fit and interfaces between components
- mechanical and electrical integration
- materials or component choices
- manufacturability and assembly
- testability, access, or service needs
Clear objectives help prevent a prototype from becoming more complicated than necessary. They also make it easier to decide what needs to be represented in hardware and what can wait for a later iteration.
2. Review the Current Design
The next step is to understand what information is available to support the build.
Depending on the product’s maturity, that may include CAD models, drawings, a bill of materials (BOM), specifications, functional requirements, prior test results, supplier information, or existing hardware.
The design does not necessarily need to be finished before developing a prototype, but unresolved issues should be understood. Missing dimensions, incomplete interfaces, uncertain component selections, or unclear test requirements may require additional engineering before or during the build.
This is also where manufacturing input becomes valuable. A feature that looks straightforward in CAD may be difficult to fabricate, assemble, inspect, or access once it becomes physical hardware.
3. Choose the Right Prototype Fidelity & Build Approach
Once the objective and starting point are understood, the team can decide how representative the prototype needs to be.
Early builds may use COTS components, alternate materials, temporary structures, or only the portion of the product required for evaluation. This allows teams to compare design choices before committing to a more production-representative configuration. More mature prototypes may require custom components, production-intent materials, tighter tolerances, more complete controls, or greater system integration.
The appropriate prototyping methods also depend on the hardware. CNC machining, sheet metal fabrication, 3D printing, additive manufacturing, purchased components, and other manufacturing techniques can each play a role depending on geometry, material, quantity, lead time, and what the prototype needs to demonstrate.
The best approach is not automatically the one that produces the most finished-looking prototype. It is the one that provides the right hardware for the engineering question being asked.
4. Prepare the Build & Source Components
Before physical work begins, the build needs a clear technical baseline.
Drawings, models, the BOM, specifications, component selections, and other build documentation should reflect the configuration the team intends to evaluate. From there, purchased components can be sourced and custom hardware can be manufactured.
Complex product prototypes often combine both. Motors, drives, sensors, bearings, controls hardware, power supplies, and other catalog components may be purchased, while frames, brackets, enclosures, precision interfaces, and other product-specific parts are manufactured to the design.
Good revision control matters here. If several versions of drawings, BOMs, or specifications are circulating, it becomes much harder to know exactly what was built and what needs to change later.
5. Build & Integrate the Prototype
Once the components are available, the prototype can be assembled.
This is where individual parts and subsystems begin interacting under real build conditions. Issues involving fit, access, wiring, routing, alignment, motion, assembly sequence, controls, or subsystem interfaces may become apparent for the first time.
For that reason, prototype building should not be treated as a simple handoff from engineering to manufacturing. Observations from technicians, machinists, fabricators, quality personnel, and engineers can all provide useful information while the hardware is coming together.
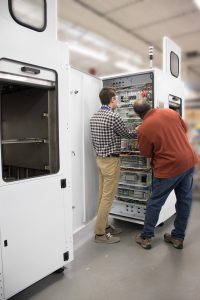
On complex electromechanical products, that connection between engineering and the physical build can make it easier to understand whether an issue is coming from the design, a component, an interface, or the way the product is being assembled.
6. Test the Prototype Against Its Objectives
Once the hardware is assembled, return to the objectives established at the beginning of the build.
Inspection and testing can be used to determine whether the prototype meets the functional requirements, critical parameters, interfaces, and other criteria the team intended to evaluate.
Not every observation will require a formal test. A prototype can also reveal practical issues with assembly access, wiring, component placement, serviceability, manufacturability, or documentation.
The important part is capturing what the build actually showed. A prototype should produce evidence that helps the team decide what is working, what needs to change, and what still needs to be evaluated.
7. Refine the Design & Build Again When Needed
Complex products rarely reach their desired configuration in a single build.
Testing or build observations may lead to changes in geometry, materials, tolerances, components, controls, interfaces, or manufacturing methods. Those changes should make their way back into the CAD models, drawings, BOM, specifications, and other technical documentation before the next iteration.
This build-test-refine cycle is a normal part of the prototyping process. Each iteration should reduce a specific area of uncertainty and move the product toward a more stable technical configuration.
The number of prototype iterations depends on the product and what the team learns along the way. The objective is not to avoid additional builds at all costs, but to make sure each build has a clear purpose.
How Much Does It Cost to Get a Prototype Made?
Prototype cost can vary considerably because the scope of the physical build can vary considerably.
Engineering effort, purchased components, custom manufacturing, assembly and integration, testing, tooling, design maturity, and the number of iterations can all affect the total budget. A subsystem built to evaluate one mechanism will have a very different cost structure from a fully integrated electromechanical machine.
For a deeper breakdown of these cost drivers and how estimates are developed, see How Much Does a Product Prototype Cost?
Should You Build a Prototype In-House or Work with a Manufacturing Partner?
The answer depends on the product, the capabilities available internally, and what the prototype needs to accomplish.
An internal engineering team may be able to handle early or narrowly focused builds. As the hardware becomes more complex, however, the program may require machining, fabrication, sourcing, assembly, controls integration, inspection, testing, or other resources that are not available under one roof.
At that point, an OEM may decide to outsource prototyping to a manufacturing partner. When evaluating prototype manufacturing companies, look beyond the ability to produce individual parts. For manufacturing-bound products, the stronger partner is one that can support the complete build and keep manufacturing feedback connected to the engineering team.
The prototype development process should create knowledge that can move forward with the program rather than being lost when the work transfers to another organization.
What Happens After a Successful Prototype?
A prototype that works is an important milestone, but it does not automatically mean the product is ready for production.
Depending on what the build revealed, the next step may be another prototype iteration, additional engineering or testing, or a move toward more production-oriented activities such as manufacturing process development and pilot production.
The transition should be based on increasing confidence in the design, requirements, interfaces, documentation, test approach, and manufacturability—not simply on whether the prototype turned on or performed once.
That is why effective prototyping in product development is closely connected to the broader NPI process. What is learned in the prototype should help prepare the product, documentation, and manufacturing approach for what comes next while helping the team anticipate common NPI challenges as the program advances.
Moving From Design to Physical Hardware
Understanding how to get a prototype made starts with defining what the build needs to prove. From there, engineering, manufacturing, assembly, testing, and documentation should work together to turn the current design into hardware that produces useful information.
PEKO supports prototype development for complex mechanical, electrical, and electromechanical products within broader NPI programs. By keeping engineering and manufacturing connected throughout the build, lessons from the prototype can carry into subsequent iterations and the next stages of manufacturing.
If you’re ready to discuss your prototype program with an outside manufacturing partner, contact our team today: